Your cart is currently empty!

Get More Life Out of Your Soil
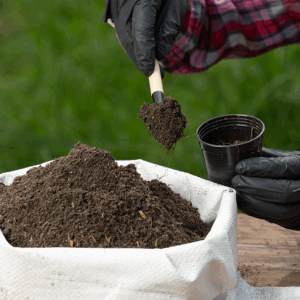
Hey friend, we love seeing growers get more life out of every bed and bag. Our Living Soil is an all natural, living and breathing ecosystem. When you care for it the right way, it actually gets better with age. Here is exactly how we reuse soil at home and in our test beds, step by step.
Step 1: Clear, keep, and assess
Gently cut spent plants at the soil line and lift out thick crowns. Fine roots can stay to decompose and feed the microbes. Remove stakes and any debris that will not break down. If your last crop struggled with a serious disease or pest, move that soil to an outdoor bed or compost and start fresh for sensitive container crops.
Step 2: Rehydrate to field capacity
Living soil likes a steady, even moisture level. If it has dried out, add water a little at a time and mix until the whole volume feels evenly damp, not soggy and not dusty.
Step 3: Re amend the nutrients
This is the simple reset. After harvest, scratch our Re amendment Pack into the top few inches, about 1.5 pounds per square yard of surface area. Water it in to wake up the biology.
Want a little extra boost
- A light drench of cold pressed fish hydrolysate adds amino acids and enzymes that microbes love. Follow the label.
- A small amount of rock phosphate supports roots and blooms. Use sparingly and as directed.
Step 4: Re inoculate and protect the soil food web
Keep that living community active between crops.
- Top dress a thin layer of quality compost or our amendment blend at planting and again mid cycle.
- Cover crop beds or big planters in the off season to add biomass, hold moisture, and block weeds.
- Consider a simple lactic acid bacteria serum if you enjoy DIY biology. It helps beneficials out compete the bad actors.
Step 5: Let it settle, then replant
If you can, give the soil about a week to settle after re amending. Keep it evenly moist so microbes stay busy. Then you are clear to plant the next round.
Tips for containers and raised planters
Good drainage is essential. Make sure excess water can escape freely. A breathable liner at the bottom keeps soil in place without clogging holes. Choose compact or bush varieties for tighter spaces and check moisture more often during hot or windy spells.
When it is better to start fresh
- The same disease or pest keeps returning even after sanitation
- Salt buildup from synthetic inputs or other contamination
- Structure has collapsed and does not rebound after rehydrating and adding organic matter
In those cases, move the old mix to landscape beds and start the container with fresh Living Soil.
A quick reuse routine you can follow every season
- Clear plants and give the soil a quick health check
- Moisten evenly to field capacity
- Scratch in our Re amendment Pack, water in
- Top dress at planting and again mid cycle
- Between crops, sow a simple cover crop and keep biology active
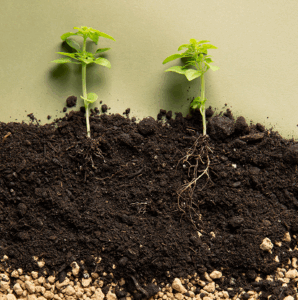
Why this works
Our Living Soil is built for a gentle, no till approach that mimics nature. Organic inputs, beneficial bacteria, and mycelium cycle nutrients for you, build structure, and improve water holding over time. When you reuse and refresh your soil this way, plants establish faster, stay resilient, and taste better too.
If you want help dialing in amounts for your exact beds or containers, share your dimensions and what you plan to grow. We will suggest a simple, customized re amendment plan that fits your setup.

Leave a Reply